Play button

1915 - 1916

Gallipoli Campaign


The Gallipoli campaign was a military campaign in the First World War that took place on the Gallipoli peninsula (Gelibolu in modern Turkey), from 19 February 1915 to 9 January 1916. The Entente powers, Britain, France and the Russian Empire, sought to weaken the Ottoman Empire, one of the Central Powers, by taking control of the Ottoman straits. This would expose the Ottoman capital at Constantinople to bombardment by Allied battleships and cut it off from the Asian part of the empire. With Turkey defeated, the Suez Canal would be safe and a year-round Allied supply route could be opened through the Black Sea to warm-water ports in Russia.


The attempt by the Allied fleet to force a passage through the Dardanelles in February 1915 failed and was followed by an amphibious landing on the Gallipoli peninsula in April 1915. In January 1916, after eight months' fighting, with approximately 250,000 casualties on each side, the land campaign was abandoned and the invasion force withdrawn. It was a costly campaign for the Entente powers and the Ottoman Empire as well as for the sponsors of the expedition, especially the First Lord of the Admiralty (1911–1915), Winston Churchill. The campaign was considered a great Ottoman victory. In Turkey, it is regarded as a defining moment in the history of the state, a final surge in the defence of the motherland as the Ottoman Empire retreated. The struggle formed the basis for the Turkish War of Independence and the declaration of the Republic of Turkey eight years later, with Mustafa Kemal Atatürk, who rose to prominence as a commander at Gallipoli, as founder and president.


The campaign is often considered to be the beginning of Australian and New Zealand national consciousness; 25 April, the anniversary of the landings, is known as Anzac Day, the most significant commemoration of military casualties and veterans in the two countries, surpassing Remembrance Day (Armistice Day).

HistoryMaps Shop

Visit Shop

Play button
1914 Nov 5

Ottoman Entry into World War I

Black Sea

On August 3 1914, the British government confiscates two Ottoman battleships for use by the Royal Navy, together with another Ottoman dreadnought being constructed in Britain. This act caused resentment in the Ottoman Empire, as the payments for both ships were complete, and contributed to the decision of the Ottoman government to join the Central Powers.


The Ottoman Empire's entry into World War I began when two recently purchased ships of its navy, still crewed by German sailors and commanded by their German admiral, carried out the Black Sea Raid, a surprise attack against Russian ports, on 29 October 1914. Russia replied by declaring war on 1 November 1914 and Russia's allies, Britain and France, then declared war on the Ottoman Empire on 5 November 1914. The reasons for the Ottoman action were not immediately clear.[1] The Ottoman government had declared neutrality in the recently started war, and negotiations with both sides were underway.

1915
Planning and Initial Landings
ornament
Play button
1915 Feb 19 - Mar 18

Allies attempt to force the Straits

Dardanelles Strait, Türkiye

On 17 February 1915, a British seaplane from HMS Ark Royal flew a reconnaissance sortie over the Straits.[2 ]Two days later, the first attack on the Dardanelles began when an Anglo-French flotilla, including the British dreadnought HMS Queen Elizabeth, began a long-range bombardment of Ottoman coastal artillery batteries. The British had intended to use eight aircraft from Ark Royal to spot for the bombardment but all but one of these, a Short Type 136, were unserviceable.[3] A period of bad weather slowed the initial phase but by 25 February the outer forts had been reduced and the entrance cleared of mines.[4] Royal Marines were landed to destroy guns at Kum Kale and Seddülbahir, while the naval bombardment shifted to batteries between Kum Kale and Kephez.[4]


Frustrated by the mobility of the Ottoman batteries, which evaded the Allied bombardments and threatened the minesweepers sent to clear the Straits, Churchill began pressuring the naval commander, Admiral Sackville Carden, to increase the fleet's efforts.[5] Carden drew up fresh plans and on 4 March sent a cable to Churchill, stating that the fleet could expect to arrive in Istanbul within 14 days.[6] A sense of impending victory was heightened by the interception of a German wireless message that revealed the Ottoman Dardanelles forts were running out of ammunition.[6] When the message was relayed to Carden, it was agreed the main attack would be launched on or around 17 March. Carden, suffering from stress, was placed on the sick list by the medical officer and command was taken over by Admiral John de Robeck.[7]


18 March 1915

On the morning of 18 March 1915, the Allied fleet, comprising 18 battleships with an array of cruisers and destroyers, began the main attack against the narrowest point of the Dardanelles, where the straits are 1 mi (1.6 km) wide. Despite some damage to the Allied ships by Ottoman return fire, minesweepers were ordered along the straits. In the Ottoman official account, by 2:00 p.m. "all telephone wires were cut, all communications with the forts were interrupted, some of the guns had been knocked out ... in consequence the artillery fire of the defence had slackened considerably".[8] The French battleship Bouvet struck a mine, causing her to capsize in two minutes, with just 75 survivors out of 718 men.[9] Minesweepers, manned by civilians, retreated under Ottoman artillery fire, leaving the minefields largely intact. HMS Irresistible and HMS Inflexible struck mines and Irresistible was sunk, with most of her surviving crew rescued; Inflexible was badly damaged and withdrawn. There was confusion during the battle about the cause of the damage; some participants blaming torpedoes. HMS Ocean was sent to rescue Irresistible but was disabled by a shell, struck a mine and was evacuated, eventually sinking.[10]


The French battleships Suffren and Gaulois sailed through a new line of mines placed secretly by the Ottoman minelayer Nusret ten days before and were also damaged.[11] The losses forced de Robeck to sound the "general recall" to protect what remained of his force.[12] During the planning of the campaign, naval losses had been anticipated and mainly obsolete battleships, unfit to face the German fleet, had been sent. Some of the senior naval officers like the commander of Queen Elizabeth, Commodore Roger Keyes, felt that they had come close to victory, believing that the Ottoman guns had almost run out of ammunition but the views of de Robeck, the First Sea Lord Jackie Fisher and others prevailed. Allied attempts to force the straits using naval power were terminated, due to the losses and bad weather.[12] Planning to capture the Turkish defences by land, to open the way for the ships, began. Two Allied submarines tried to traverse the Dardanelles but were lost to mines and the strong currents.[13]

Allied Landing Preparations
Apparently it was the mascot of Australian troops stationed in Egypt before being deployed to Gallipolli. ©Image Attribution forthcoming. Image belongs to the respective owner(s).
1915 Mar 19 - Apr 19

Allied Landing Preparations

Alexandria, Egypt

After the failure of the naval attacks, troops were assembled to eliminate the Ottoman mobile artillery, which was preventing the Allied minesweepers from clearing the way for the larger vessels. Kitchener appointed General Sir Ian Hamilton to command the 78,000 men of the Mediterranean Expeditionary Force (MEF). Soldiers from the Australian Imperial Force (AIF) and New Zealand Expeditionary Force (NZEF) were encamped in Egypt, undergoing training prior to being sent to France.[14] The Australian and New Zealand troops were formed into the Australian and New Zealand Army Corps (ANZAC), commanded by Lieutenant General Sir William Birdwood, comprising the volunteer 1st Australian Division and the New Zealand and Australian Division.


Over the following month, Hamilton prepared his plan and the British and French divisions joined the Australians in Egypt. Hamilton chose to concentrate on the southern part of the Gallipoli peninsula at Cape Helles and Seddülbahir, where an unopposed landing was expected.[15] The Allies initially discounted the fighting ability of the Ottoman soldiers.[16]


The troops for the assault were loaded on transports in the order they were to disembark, causing a long delay which meant that many troops, including the French at Mudros, were forced to detour to Alexandria to embark on the ships that would take them into battle. A five-week delay until the end of April ensued, during which the Ottomans strengthened their defences on the peninsula; although bad weather during March and April might have delayed the landings anyway, preventing supply and reinforcement. Following preparations in Egypt, Hamilton and his headquarters staff arrived at Mudros on 10 April. The ANZAC Corps departed Egypt in early April and assembled on the island of Lemnos in Greece on 12 April, where a small garrison had been established in early March and practice landings were undertaken. The British 29th Division departed for Mudros on 7 April and the Royal Naval Division rehearsed on the island of Skyros, after arriving there on 17 April. The Allied fleet and British and French troops assembled at Mudros, ready for the landings but poor weather from 19 March grounded Allied aircraft for nine days and on 24 days only a partial programme of reconnaissance flights were possible.[17]

1915
Stalemate and Trench Warfare
ornament
Play button
1915 Apr 25 - Apr 26

Landing at Cape Helles

Cape Helles, Seddülbahir/Eceab

The Helles landing was made by the 29th Division (Major General Aylmer Hunter-Weston). The division landed on five beaches in an arc about the tip of the peninsula, named 'S', 'V', 'W', 'X' and 'Y' Beaches from east to west. On 1 May, the 29th Indian Brigade (including 1/6th Gurkha Rifles) landed, took and secured Sari Bair above the landing beaches and was joined by 1/5th Gurkha Rifles and 2/10th Gurkha Rifles; the Zion Mule Corps landed at Helles on 27 April.[18] At 'Y' Beach, during the first engagement, the First Battle of Krithia, the Allies landed unopposed and advanced inland. There were only a small number of defenders in the village but lacking orders to exploit the position, the 'Y' Beach commander withdrew his force to the beach. It was as close as the Allies ever came to capturing the village as the Ottomans brought up a battalion of the 25th Regiment, checking any further movement.


The main landings were made at 'V' Beach, beneath the old Seddülbahir fortress and at 'W' Beach, a short distance to the west on the other side of the Helles headland. The covering force of Royal Munster Fusiliers and Hampshires landed from a converted collier, SS River Clyde, which was run aground beneath the fortress so that the troops could disembark along ramps. The Royal Dublin Fusiliers landed at 'V' Beach and the Lancashire Fusiliers at 'W' Beach in open boats, on a shore overlooked by dunes and obstructed with barbed wire. On both beaches the Ottoman defenders occupied good defensive positions and inflicted many casualties on the British infantry as they landed. Troops emerging one by one from sally ports on River Clyde were shot by machine-gunners at the Seddülbahir fort and of the first 200 soldiers to disembark, 21 men reached the beach.[19]


The Ottoman defenders were too few to defeat the landing but inflicted many casualties and contained the attack close to the shore. By the morning of 25 April, out of ammunition and with nothing but bayonets to meet the attackers on the slopes leading up from the beach to the heights of Chunuk Bair, the 57th Infantry Regiment received orders from Kemal "I do not order you to fight, I order you to die. In the time which passes until we die, other troops and commanders can come forward and take our places". Every man of the regiment was either killed or wounded.[20]


At 'W' Beach, thereafter known as Lancashire Landing, the Lancashires were able to overwhelm the defenders despite the loss of 600 casualties from 1,000 men. Six awards of the Victoria Cross were made among the Lancashires at 'W' Beach. A further six Victoria Crosses were awarded among the infantry and sailors at the 'V' Beach landing and three more were awarded the following day as they fought their way inland. Five squads of Ottoman infantry led by Sergeant Yahya distinguished themselves by repulsing several attacks on their hilltop position, the defenders eventually disengaging under cover of darkness. After the landings, so few men remained from the Dublin and Munster Fusiliers that they were amalgamated into The Dubsters. Only one Dubliner officer survived the landing, while of the 1,012 Dubliners who landed, just 11 survived the Gallipoli campaign unscathed.[21] After the landings, little was done by the Allies to exploit the situation, apart from a few limited advances inland by small groups of men. The Allied attack lost momentum and the Ottomans had time to bring up reinforcements and rally the small number of defending troops.

Play button
1915 Apr 25

Landing at Anzac Cove

Anzac Cove, Turkey

The landing at Anzac Cove on Sunday, 25 April 1915, also known as the landing at Gaba Tepe and, to the Turks, as the Arıburnu Battle, was part of the amphibious invasion of the Gallipoli Peninsula by the forces of the British Empire, which began the land phase of the Gallipoli Campaign of the First World War.


The assault troops, mostly from the Australian and New Zealand Army Corps (ANZAC), landed at night on the western (Aegean Sea) side of the peninsula. They were put ashore one mile (1.6 km) north of their intended landing beach. In the darkness, the assault formations became mixed up, but the troops gradually made their way inland, under increasing opposition from the Ottoman Turkish defenders. Not long after coming ashore, the ANZAC plans were discarded, and the companies and battalions were thrown into battle piecemeal and received mixed orders. Some advanced to their designated objectives, while others were diverted to other areas and ordered to dig in along defensive ridge lines.


Although they failed to achieve their objectives, by nightfall the ANZACs had formed a beachhead, albeit much smaller than intended. In some places, they were clinging onto cliff faces with no organised defence system. Their precarious position convinced both divisional commanders to ask for an evacuation, but after taking advice from the Royal Navy about how practicable that would be, the army commander decided they would stay. The exact number of the day's casualties is not known. The ANZACs had landed two divisions, but over two thousand of their men had been killed or wounded, together with at least a similar number of Turkish casualties.

Early Battles
Anzac, the landing 1915 by George Lambert, 1922 shows the landing at Anzac Cove, 25 April 1915. ©Image Attribution forthcoming. Image belongs to the respective owner(s).
1915 Apr 27 - Apr 30

Early Battles

Cape Helles, Seddülbahir/Eceab

On the afternoon of 27 April, the 19th Division, reinforced by six battalions from the 5th Division, counter-attacked the six Allied brigades at Anzac.[22] With the support of naval gunfire, the Allies held back the Ottomans throughout the night. The following day the British were joined by French troops transferred from Kum Kale on the Asiatic shore to the right of the line near 'S' Beach at Morto Bay. On 28 April, the Allies fought the First Battle of Krithia to capture the village.[23] Hunter-Weston made a plan which proved overly complex and was poorly communicated to the commanders in the field. The troops of the 29th Division were still exhausted and unnerved by the battles for the beaches and for Seddülbahir village, which was captured after much fighting on 26 April. The Ottoman defenders stopped the Allied advance halfway between the Helles headland and Krithia around 6:00 p.m., having inflicted 3,000 casualties.[24]


As Ottoman reinforcements arrived, the possibility of a swift Allied victory on the peninsula disappeared and the fighting at Helles and Anzac became a battle of attrition. On 30 April, the Royal Naval Division (Major General Archibald Paris) landed. The same day, Kemal, believing that the Allies were on the verge of defeat, began moving troops forward through Wire Gulley, near the 400 Plateau and Lone Pine. Eight battalions of reinforcements were dispatched from Istanbul a day later and that afternoon, Ottoman troops counter-attacked at Helles and Anzac. The Ottomans briefly broke through in the French sector but the attacks were repulsed by massed Allied machine-gun fire, which inflicted many casualties on the attackers.[25] The following night, Birdwood ordered the New Zealand and Australian Division to attack from Russell's Top and Quinn's Post towards Baby 700. The Australian 4th Infantry Brigade (Colonel John Monash), the New Zealand Infantry Brigade and Royal Marines from the Chatham Battalion took part in the attack. Covered by a naval and artillery barrage, the troops advanced a short distance during the night but got separated in the dark. The attackers came under massed small-arms fire from their exposed left flank and were repulsed, having suffered about 1,000 casualties.[26]

Play button
1915 Apr 28

First Battle of Krithia

Sedd el Bahr Fortress, Seddülb

The First Battle of Krithia was the first Allied attempt to advance in the Battle of Gallipoli. Starting on 28 April, three days after the Landing at Cape Helles, the defensive power of the Ottoman forces quickly overwhelmed the attack, which suffered from poor leadership and planning, lack of communications, and exhaustion & demoralisation of the troops.


The battle commenced around 8:00 a.m. on 28 April with a naval bombardment. The plan of advance was for the French to hold position on the right while the British line would pivot, capturing Krithia and assailing Achi Baba from the south and west. The overly-complex plan was poorly communicated to the brigade and battalion commanders of the 29th Division who would make the attack. Hunter-Weston remained far from the front; because of this, he was not able to exert any control as the attack developed. The initial advances were easy but as pockets of Ottoman resistance were encountered, some stretches of the line were held up while others kept moving, thereby becoming outflanked. As the troops advanced further up the peninsula, the terrain became more difficult as they encountered the four great ravines that ran from the heights around Achi Baba towards the cape.[27]


On the extreme left, the British ran into Gully Ravine which was as wild and confusing as the ground at Anzac Cove. Two battalions of the 87th Brigade (1st Border Regiment and 1st Royal Inniskilling Fusiliers) entered the ravine but were halted by a machine gun post near 'Y' Beach. No further advance would be made up the ravine until the 1/6th Gurkha Rifles captured the post on the night of 12/13 May. This involved them going up a 300-foot (91 m) vertical slope, upon which the Royal Marine Light Infantry and the Royal Dublin Fusiliers had been defeated. The site became known as 'Gurkha Bluff'. The exhausted, demoralised and virtually leaderless British troops could go no further in the face of stiffening Ottoman resistance. In some places, Ottoman counter-attacks drove the British back to their starting positions. By 6:00 p.m. the attack was called off.[28]

Play button
1915 May 6 - May 8

Second Battle of Krithia

Krithia, Alçıtepe/Eceabat/Çana

On 5 May, the 42nd (East Lancashire) Division was dispatched from Egypt. Believing Anzac to be secure, Hamilton moved the Australian 2nd Infantry Brigade and the New Zealand Infantry Brigade, along with 20 Australian field guns, to the Helles front as reserves for the Second Battle of Krithia. Involving a force of 20,000 men, it was the first general attack at Helles and was planned for daylight. French troops were to capture Kereves Dere and the British, Australians and New Zealanders were assigned Krithia and Achi Baba. After 30 minutes of artillery preparation, the assault began at mid-morning on 6 May. The British and French advanced along the Gully, Fir Tree, Krithia and Kereves spurs which were separated by deep gullies, fortified by the Ottomans. As the attackers advanced, they became separated when trying to outflank Ottoman strong points and found themselves in unfamiliar terrain. Under artillery and then machine-gun fire from Ottoman outposts that had not been spotted by British aerial reconnaissance, the attack was stopped; next day, reinforcements resumed the advance.


The attack continued on 7 May and four battalions of New Zealanders attacked up Krithia Spur on 8 May; with the 29th Division the attackers managed to reach a position just south of the village. Late in the afternoon, the Australian 2nd Brigade advanced quickly over open ground to the British front line. Amidst small arms and artillery-fire, the brigade charged towards Krithia and gained 600 m (660 yd), about 400 m (440 yd) short of the objective, with 1,000 casualties. Near Fir Tree Spur, the New Zealanders managed to get forward and link up with the Australians, although the British were held up and the French were exhausted, despite having occupied a point overlooking their objective. The attack was suspended and the Allies dug in, having failed to take Krithia or Achi Baba.


About one-third of the Allied soldiers who fought in the battle became casualties. General Hamilton could ill-afford such losses as they made it difficult enough to hold the little ground he had, let alone continue to capture more. The poor planning of the battle extended to the medical provisions for the wounded which were woeful. The few stretcher bearers that were available often had to carry their burdens all the way to the beach as there was no intermediate collecting station with wagon transport. The hospital ship arrangements were also inadequate so that once the wounded were taken off the beach they would have trouble finding a ship prepared to take them on board. With the failure of the second battle, Hamilton made a request to the British Secretary of State for War, Lord Kitchener, for an additional four divisions. He was promised the British 52nd (Lowland) Division but would not receive any more until August.

Naval Operations
E11 torpedoes the Stamboul off Constantinople, 25 May 1915. ©Hermanus Willem Koekkoek
1915 May 13 - May 23

Naval Operations

Kemankeş Karamustafa Paşa, Gal

The British advantage in naval artillery diminished after the battleship HMS Goliath was torpedoed and sunk on 13 May by the Ottoman destroyer Muâvenet-i Millîye, killing 570 men out of a crew of 750, including the ship's commander, Captain Thomas Shelford.[29] A German submarine, U-21, sank HMS Triumph on 25 May and HMS Majestic on 27 May.[30] More British reconnaissance patrols were flown around Gallipoli and U-21 was forced to leave the area but ignorant of this, the Allies withdrew most of their warships to Imbros, where they were "protectively tethered" between sorties, which greatly reduced Allied naval firepower, particularly in the Helles sector.[31] The submarine HMS E11 passed through the Dardanelles on 18 May and sank or disabled eleven ships, including three on 23 May, before entering Istanbul Harbour, firing on a transport alongside the arsenal, sinking a gunboat and damaging the wharf.[32] E11's attack on Constantinople, the first by an enemy vessel in over 100 years, had an enormous impact on Turkish morale, causing a panic in the city. 

Play button
1915 May 19

Third Attack on Anzac Cove

Anzac Cove, Türkiye

Just over two weeks after the ANZAC landings, the Turks had gathered a force of 42,000 men (four divisions) to conduct their second assault against the ANZAC's 17,300 men (two divisions). The ANZAC commanders had no indication of the impending attack until the day before, when British aircraft reported a build-up of troops opposite the ANZAC positions.


The Turkish assault began in the early hours of 19 May, mostly directed at the centre of the ANZAC position. It had failed by midday; the Turks were caught by enfilade fire from the defenders' rifles and machine-guns, which caused around ten thousand casualties, including three thousand deaths. The ANZACs had less than seven hundred casualties. Expecting an imminent continuation of the battle, three Allied brigades arrived within twenty-four hours to reinforce the beachhead, but no subsequent attack materialised. Instead, on 20 and 24 May two truces were declared to collect the wounded and bury the dead in no man's land. The Turks never succeeded in capturing the bridgehead; instead the ANZACs evacuated the position at the end of the year.

Ottoman Tactics and Australian Counterattacks
Turkish troop during the Gallipoli campaign. ©Image Attribution forthcoming. Image belongs to the respective owner(s).
1915 Jun 1

Ottoman Tactics and Australian Counterattacks

Anzac Cove, Türkiye

The Ottoman forces lacked artillery ammunition and field batteries were only able to fire c. 18,000 shells between early May and the first week of June. After the defeat of the counter-attack at Anzac in mid-May, the Ottoman forces ceased frontal assaults. Late in the month, the Ottomans began tunneling around Quinn's Post in the Anzac sector and early in the morning of 29 May, despite Australian counter-mining, detonated a mine and attacked with a battalion from the 14th Regiment. The Australian 15th Battalion was forced back but counter-attacked and recaptured the ground later in the day, before being relieved by New Zealand troops. Operations at Anzac in early June returned to consolidation, minor engagements and skirmishing with grenades and sniper-fire.

Play button
1915 Jun 28 - Jul 5

Battle of Gully Ravine

Cwcg Pink Farm Cemetery, Seddü

After two days of heavy bombardment, battle began at 10.45 am on 28 June with a preliminary raid to capture the Boomerang Redoubt on Gully Spur.[33] The general advance commenced shortly afterwards. The artillery fire on Gully Spur was overwhelming and the 2/10th Gurkha Rifles and the 2nd Battalion of the Royal Fusiliers advanced rapidly a distance of half a mile to a point named "Fusilier Bluff" which was to become the northernmost Allied position at Helles.


On the right of the advance, along Fir Tree Spur, the battle did not go so well for the British. The inexperienced soldiers of the 156th Brigade lacked artillery support and were massacred by Ottoman machine guns and bayonet attacks. Despite the opposition, they were ordered to press the attack and so the support and reserve lines were sent forward but made no progress. By the time the attack was halted the Brigade was at half strength, having suffered casualties of which 800 had been killed.[34] Some battalions were so depleted they had to be merged into composite formations. When the rest of the 52nd Division landed, the commander, Major General Granville Egerton, was enraged at the manner in which his 156th Brigade had been sacrificed.


The Ottomans, with plentiful manpower in reserve but lacking any significant artillery and machine guns, made incessant counter-attacks culminating with the strongest on 5 July but all were repulsed. Still, the control of the strategic hills overlooking Sıgındere and Kerevizdere were denied to the Allies by massive Ottoman bayonet attacks. The Ottoman casualties for the period between 28 June and 5 July are estimated at between 14,000 and 16,000, four times the British losses. Where possible the Ottoman dead were burned but a truce to bury them was refused. The British believed the dead bodies were an effective barrier and that Ottoman soldiers were unwilling to attack across them. This was one of the few truly unvalorous and unmagnanimous acts committed by Allies which infuriated the Ottoman greatly.


On 5 July the last major attack of this battle commenced but met with a very strong wall of fire the Allies put up. The dead were mounting again in front of the British trenches. Mehmet Ali Paşa staff were of the opinion that the Allied advance was already halted and there was no need for these heavy losses. Mehmet Ali Paşa, in fear of a reaction from Liman Paşa, who was in turn intimidated by Enver Paşa hesitated. Again, Major Eggert intervened and Liman Paşa yielded. Finally the slaughter was stopped. This was the bloodiest episode in the entire campaign. After the counter-attacks ceased, the front line stabilised and remained largely static for the rest of the Gallipoli campaign although both sides engaged in a vigorous mining war around the ravine.

Battle of Krithia Vineyard
©Image Attribution forthcoming. Image belongs to the respective owner(s).
1915 Aug 6 - Aug 13

Battle of Krithia Vineyard

Redoubt Cemetery, Alçıtepe/Ece

The Battle of Krithia Vineyard was originally intended as a minor British action at Helles on the Gallipoli peninsula to divert attention from the imminent launch of the August Offensive, but instead, the British commander, Brigadier General H.E. Street, mounted a futile and bloody series of attacks that in the end gained a small patch of ground known as "The Vineyard".


Due to a shortage of artillery, the attack was split into two parts with the 88th Brigade of the 29th Division (with support on its right flank from the 1/5th Battalion, Manchester Regiment) attacking on the afternoon of 6 August while the 125th and 127th Brigades of the 42nd (East Lancashire) Division would attack early the following morning. The 52nd (Lowland) Infantry Division and the 63rd (Royal Naval) Division in Corps reserve. They were facing four Ottoman divisions, three of which were fresh, while there were two more divisions in reserve.[35]


The 88th Brigade's attack managed to capture some Ottoman trenches, which were recaptured by the Ottoman 30th Regiment during a counter-attack. The British attacked again and once more captured some trenches, but the Ottomans counter-attacked again and drove them out. The British failed to hold any ground and the 88th Brigade reported casualties of 1,905 men[36], (fully 2/3 of the original Brigade strength), effectively destroying them as a fighting force. At around 9:40 am on the morning of 7 August the 42nd Division attacked on the right of the 88th Brigade's sector. The 127th Brigade managed to break through the line held by the Ottoman 13th Division, but were forced back by an Ottoman counter-attack.


The Ottomans counter-attacked repeatedly from 7 August to 9 August and the fighting in the area continued until 13 August when it finally subsided. Afterwards, this sector of the Helles front would remain one of the busiest and most violent for the remainder of the campaign.

Battle of Sari Bair
Southern Trench in Lone Pine, Gallipoli, 8 August 1915 ©Image Attribution forthcoming. Image belongs to the respective owner(s).
1915 Aug 6 - Aug 21

Battle of Sari Bair

Suvla Cove, Küçükanafarta/Ecea

The Battle of Sari Bair, also known as the August Offensive, represented the final attempt made by the British in August 1915 to seize control of the Gallipoli peninsula from the Ottoman Empire during the First World War. At the time of the battle, the Gallipoli Campaign had raged on two fronts – Anzac and Helles – for three months since the Allied land invasion of 25 April 1915. With the Anzac front locked in a tense stalemate, the Allies had attempted to carry the offensive on the Helles battlefield – at enormous cost and for little gain. In August, the British command proposed a new operation to reinvigorate the campaign by capturing the Sari Bair ridge, the high ground that dominated the middle of the Gallipoli peninsula above the Anzac landing.


The main operation started on 6 August with a fresh landing 5 miles (8.0 km) north of Anzac at Suvla Bay in conjunction with the Australian and New Zealand Army Corps. The Allies mounted an attack north into the rugged country alongside the Sari Bair range with the aim of capturing the high ground and linking with the Suvla landing. At Helles, the British and French were now to remain largely on the defensive.

Play button
1915 Aug 6 - Aug 10

Battle of Lone Pine

Lone Pine (Avustralya) Anıtı,

The Battle of Lone Pine was part of a diversionary attack to draw Ottoman attention away from the main assaults being conducted by British, Indian and New Zealand troops around Sari Bair, Chunuk Bair and Hill 971, which became known as the August Offensive. At Lone Pine, the assaulting force, initially consisting of the Australian 1st Brigade, managed to capture the main trench line from the two Ottoman battalions that were defending the position in the first few hours of the fighting on 6 August. Over the next three days, the fighting continued as the Ottomans brought up reinforcements and launched numerous counterattacks in an attempt to recapture the ground they had lost. As the counterattacks intensified the ANZACs brought up two fresh battalions to reinforce their newly gained line. Finally, on 9 August the Ottomans called off any further attempts and by 10 August offensive action ceased, leaving the Allies in control of the position. Nevertheless, despite the Australian victory, the wider August Offensive of which the attack had been a part failed and a situation of stalemate developed around Lone Pine which lasted until the end of the campaign in December 1915 when Allied troops were evacuated from the peninsula.

Play button
1915 Aug 7

Battle of the Nek

Chunuk Bair Cemetery, Kocadere

The Battle of the Nek was a minor battle that took place on 7 August 1915. "The Nek" was a narrow stretch of ridge on the Gallipoli Peninsula. The name derives from the Afrikaans word for a "mountain pass" but the terrain itself was a perfect bottleneck and easy to defend, as had been proven during an Ottoman attack in June. It connected Australian and New Zealand trenches on the ridge known as "Russell's Top" to the knoll called "Baby 700" on which the Ottoman defenders were entrenched.


A feint attack by Australian troops was planned at the Nek to support New Zealand troops assaulting Chunuk Bair. Early on 7 August 1915, two regiments of the Australian 3rd Light Horse Brigade, one of the formations under the command of Major General Alexander Godley for the offensive, mounted a futile bayonet attack on the Ottoman trenches on Baby 700. Due to poor co-ordination and inflexible decision making, the Australians suffered heavy casualties for no gain. A total of 600 Australians took part in the assault, assaulting in four waves; 372 were killed or wounded. Ottoman casualties were negligible.

Play button
1915 Aug 7 - Aug 19

Battle of Chunuk Bair

Chunuk Bair Cemetery, Kocadere

The capture of Chunuk Bair, the secondary peak of the Sari Bair range, was one of the two objectives of the Battle of Sari Bair. British units that reached the summit of Chunuk Bair early on 8 August 1915 to engage the Turks were the Wellington Battalion of the New Zealand and Australian Division, 7th (Service) Battalion, Gloucestershire Regiment; and 8th (Service) Battalion, Welch Regiment, both of the 13th (Western) Division. The troops were reinforced in the afternoon by two squads of the Auckland Mounted Rifles Regiment, also part of the New Zealand and Australian Division. The first troops on the summit were severely depleted by Ottoman return fire and were relieved at 10:30 pm on 8 August by the Otago Battalion (NZ), and the Wellington Mounted Rifles Regiment, New Zealand and Australian Division. The New Zealand troops were relieved by 8:00 pm on 9 August by the 6th Battalion, South Lancashire Regiment, and 5th Battalion, Wiltshire Regiment, who were massacred and driven off the summit in the early morning of 10 August, by an Ottoman counter-attack led by Mustafa Kemal.


The British August Offensive at Anzac Cove and Suvla was an attempt to try to break the stalemate that the Gallipoli Campaign had become. The capture of Chunuk Bair was the only success for the Allies of the campaign but it was fleeting as the position proved untenable. The Ottomans recaptured the peak for good a few days later.

Battle of Hill 60
Australian light horseman using a periscope rifle. ©Image Attribution forthcoming. Image belongs to the respective owner(s).
1915 Aug 21 - Aug 29

Battle of Hill 60

Cwgc Hill 60 Cemetery, Büyükan

The Battle of Hill 60 was the last major assault of the Gallipoli Campaign. It was launched on 21 August 1915 to coincide with the attack on Scimitar Hill made from the Suvla front by Major-General H. de B. De Lisle's British IX Corps, Frederick Stopford having been replaced in the few days previous. Hill 60 was a low knoll at the northern end of the Sari Bair range which dominated the Suvla landing. Capturing this hill along with Scimitar Hill would have allowed the Anzac and Suvla landings to be securely linked.


Two major attacks were made by Allied forces, the first on 21 August and the second on 27 August. The first assault resulted in limited gains around the lower parts of the hill, but the Ottoman defenders managed to hold the heights even after the attack was continued by a fresh Australian battalion on 22 August. Reinforcements were committed, but nevertheless the second major assault on 27 August fared similarly, and although fighting around the summit continued over the course of three days, at the end of the battle the Ottoman forces remained in possession of the summit.

Battle of Scimitar Hill
Australian troops charging an Ottoman trench, just before the evacuation at Anzac. ©Image Attribution forthcoming. Image belongs to the respective owner(s).
1915 Aug 21

Battle of Scimitar Hill

Suvla Cove, Küçükanafarta/Ecea

The Battle of Scimitar Hill was the last offensive mounted by the British at Suvla during the Battle of Gallipoli in World War I. It was also the largest single-day attack ever mounted by the Allies at Gallipoli, involving three divisions. The purpose of the attack was to remove the immediate Ottoman threat from the exposed Suvla landing and to link with the ANZAC sectors to the south. Launched on 21 August 1915 to coincide with the simultaneous attack on Hill 60, it was a costly failure, in which the Turks were forced to use all their reserves in "severe and bloody fighting" far into the night, with some Turkish trenches lost and retaken twice.[37]

1915 - 1916
Evacuation and Withdrawal
ornament
Play button
1916 Jan 9

Evacuation

Cape Helles, Seddülbahir/Eceab

After the failure of the August Offensive, the Gallipoli campaign drifted. Ottoman success began to affect public opinion in Britain, with criticism of Hamilton's performance being smuggled out by Keith Murdoch, Ellis Ashmead-Bartlett and other reporters. Stopford and other dissident officers also contributed to the air of gloom and the possibility of evacuation was raised on 11 October 1915. Hamilton resisted the suggestion, fearing the damage to British prestige but was sacked shortly afterwards and replaced by Lieutenant General Sir Charles Monro. Autumn and winter brought relief from the heat but also led to gales, blizzards and flooding, resulting in men drowning and freezing to death, while thousands suffered frostbite. The Serbian defeat in the Serbian campaign in autumn 1915 prompted France and Britain to transfer troops from the Gallipoli campaign to Greek Macedonia; the Macedonian front was established to support the remnants of the Serbian army to conquer Vardar Macedonia.


The situation at Gallipoli was complicated by Bulgaria joining the Central Powers. In early October 1915, the British and French opened a second Mediterranean front at Salonika, by moving two divisions from Gallipoli and reducing the flow of reinforcements.[38] A land route between Germany and the Ottoman Empire through Bulgaria was opened and the Germans rearmed the Ottomans with heavy artillery capable of devastating Allied trenches, especially on the confined front at Anzac, modern aircraft and experienced crews. In late November, an Ottoman crew in a German Albatros C.I shot down a French aircraft over Gaba Tepe and the Austro-Hungarian 36. Haubitzbatterie and 9. Motormörserbatterie artillery units arrived, providing a substantial reinforcement of the Ottoman artillery.[39] Monro recommended evacuation to Kitchener, who in early November visited the eastern Mediterranean. After consulting with the commanders of VIII Corps at Helles, IX Corps at Suvla and Anzac, Kitchener agreed with Monro and passed his recommendation to the British Cabinet, who confirmed the decision to evacuate in early December.


Helles was retained for a period but a decision to evacuate the garrison was made on 28 December.[40] Unlike the evacuation from Anzac Cove, Ottoman forces were looking for signs of withdrawal. Having used the interval to bring up reinforcements and supplies, Sanders mounted an attack on the British at Gully Spur on 7 January 1916 with infantry and artillery but the attack was a costly failure.[41] Mines were laid with time fuzes and that night and on the night of 7/8 January, under the cover of a naval bombardment, the British troops began to fall back 5 mi (8.0 km) from their lines to the beaches, where makeshift piers were used to board boats. The last British troops departed from Lancashire Landing around 04:00 on 8 January 1916. The Newfoundland Regiment was part of the rearguard and withdrew on 9 January 1916. Among the first to land, remnants of The Plymouth Battalion, Royal Marine Light Infantry were the last to leave the Peninsula.

1916 Feb 1

Epilogue

Gallipoli/Çanakkale, Türkiye

Historians are divided about how they summarise the campaign's result. Broadbent describes the campaign as "a close-fought affair" that was a defeat for the Allies, while Carlyon views the overall result as a stalemate. Peter Hart disagrees, arguing that the Ottoman forces "held the Allies back from their real objectives with relative ease", while Haythornthwaite calls it a "disaster for the Allies". The campaign did cause "enormous damage to ... Ottoman national resources", and at that stage of the war the Allies were in a better position to replace their losses than the Ottomans, but ultimately the Allied attempt at securing a passage through the Dardanelles proved unsuccessful. While it diverted Ottoman forces away from other areas of conflict in the Middle East, the campaign also consumed resources the Allies could have employed on the Western Front, and also resulted in heavy losses on the Allied side.


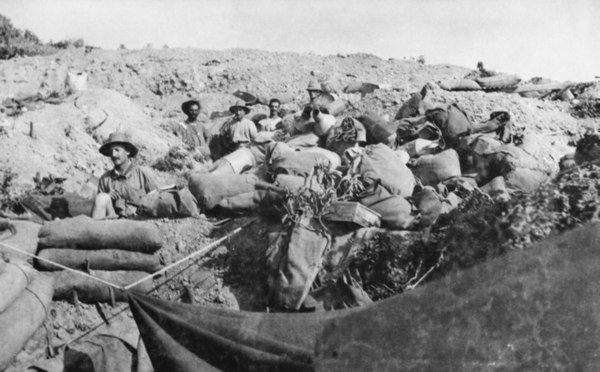
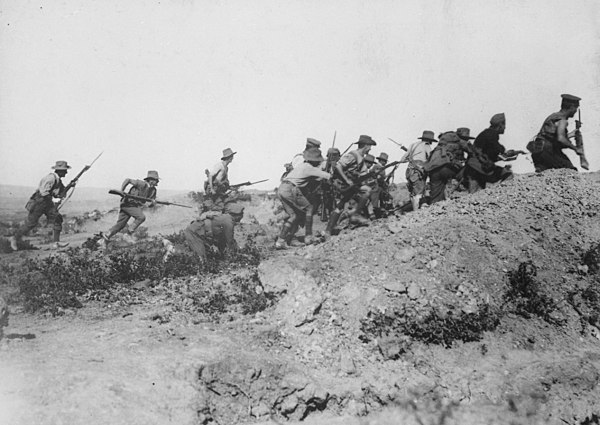
The Allied campaign was plagued by ill-defined goals, poor planning, insufficient artillery, inexperienced troops, inaccurate maps, poor intelligence, overconfidence, inadequate equipment, and logistical and tactical deficiencies at all levels. Geography also proved a significant factor. While the Allied forces possessed inaccurate maps and intelligence and proved unable to exploit the terrain to their advantage, the Ottoman commanders were able to utilise the high ground around the Allied landing beaches to position well-sited defences that limited the ability of Allied forces to penetrate inland, confining them to narrow beaches. The campaign's necessity remains the subject of debate,and the recriminations that followed were significant, highlighting the schism that had developed between military strategists who felt the Allies should focus on fighting on the Western Front and those who favoured trying to end the war by attacking Germany's "soft underbelly", its allies in the east.


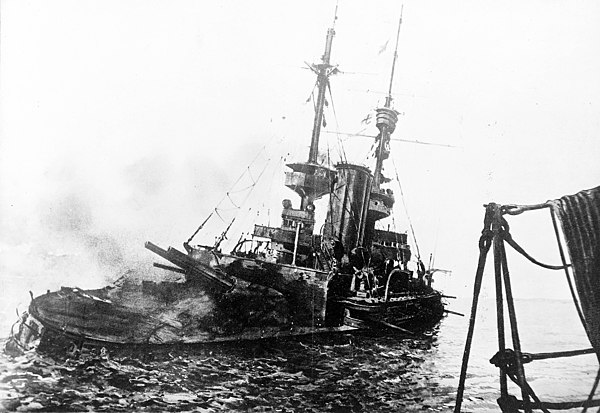
British and French submarine operations in the Sea of Marmara were the one significant area of success of the Gallipoli campaign, forcing the Ottomans to abandon the sea as a transport route. Between April and December 1915, nine British and four French submarines carried out 15 patrols, sinking one battleship, one destroyer, five gunboats, 11 troop transports, 44 supply ships and 148 sailing vessels at a cost of eight Allied submarines sunk in the strait or in the Sea of Marmara. During the campaign there was always one British submarine in the Sea of Marmara, sometimes two; in October 1915, there were four Allied submarines in the region. E2 left the Sea of Marmara on 2 January 1916, the last British submarine in the region. Four E-class and five B-class submarines remained in the Mediterranean Sea following the evacuation of Helles. By this time the Ottoman navy had been all but forced to cease operations in the area, while merchant shipping had also been significantly curtailed. The official German naval historian, Admiral Eberhard von Mantey, later concluded that had the sea-lanes of communication been completely severed the Ottoman 5th Army would likely have faced catastrophe. As it was these operations were a source of significant anxiety, posing a constant threat to shipping and causing heavy losses, effectively dislocating Ottoman attempts to reinforce their forces at Gallipoli and shelling troop concentrations and railways.


The significance of the Gallipoli campaign is felt strongly in both Australia and New Zealand, despite their being only a portion of the Allied forces; the campaign is regarded in both nations as a "baptism of fire" and had been linked to their emergence as independent states. Approximately 50,000 Australians served at Gallipoli and from 16,000 to 17,000 New Zealanders. It has been argued that the campaign proved significant in the emergence of a unique Australian identity following the war, which has been closely linked to popular conceptualisations of the qualities of the soldiers that fought during the campaign, which became embodied in the notion of an "Anzac spirit".

Appendices


APPENDIX 1

The reason Gallipoli failed


Play button


APPENDIX 2

The Goeben & The Breslau - Two German Ships Under Ottoman Flag


Play button


APPENDIX 3

The attack on a Mobile Battery at Gallipoli by Eric 'Kipper' Robinson


Play button


APPENDIX 4

The Morale and Discipline of British and Anzac troops at Gallipoli | Gary Sheffield


Play button

Characters


Halil Sami Bey

Halil Sami Bey

Colonel of the Ottoman Army

Herbert Kitchener

Herbert Kitchener

Secretary of State for War

William Birdwood

William Birdwood

Commander of ANZAC forces

Otto Liman von Sanders

Otto Liman von Sanders

Commander of the Ottoman 5th Army

Mustafa Kemal Atatürk

Mustafa Kemal Atatürk

Lieutenant Colonel

Wehib Pasha

Wehib Pasha

General in the Ottoman Army

Mehmet Esat Bülkat

Mehmet Esat Bülkat

Senior Ottoman commander

Cevat Çobanlı

Cevat Çobanlı

General of the Ottoman Army

Enver Pasha

Enver Pasha

Minister of War

Fevzi Çakmak

Fevzi Çakmak

Commander of the V Corps

Cemil Conk

Cemil Conk

Officer of the Ottoman Army

John de Robeck

John de Robeck

Naval Commander in the Dardanelles

Ian Hamilton

Ian Hamilton

British Army officer

Henri Gouraud

Henri Gouraud

French General

Faik Pasha

Faik Pasha

General of the Ottoman Army

Kâzım Karabekir

Kâzım Karabekir

Commander of the 14th Division

Winston Churchill

Winston Churchill

First Lord of the Admiralty

Footnotes


  1. Ali Balci, et al. "War Decision and Neoclassical Realism: The Entry of the Ottoman Empire into the First World War."War in History(2018),doi:10.1177/0968344518789707
  2. Broadbent, Harvey(2005).Gallipoli: The Fatal Shore. Camberwell, VIC: Viking/Penguin.ISBN 978-0-670-04085-8,p.40.
  3. Gilbert, Greg (2013). "Air War Over the Dardanelles".Wartime. Canberra: Australian War Memorial (61): 42-47.ISSN1328-2727,pp.42-43.
  4. Hart, Peter (2013a). "The Day It All Went Wrong: The Naval Assault Before the Gallipoli Landings".Wartime. Canberra: Australian War Memorial (62).ISSN1328-2727, pp.9-10.
  5. Hart 2013a, pp.11-12.
  6. Fromkin, David(1989).A Peace to End All Peace: The Fall of the Ottoman Empire and the Creation of the Modern Middle East. New York: Henry Holt.ISBN 978-0-8050-0857-9,p.135.
  7. Baldwin, Hanson (1962).World War I: An Outline History. London: Hutchinson.OCLC793915761,p.60.
  8. James, Robert Rhodes (1995) [1965].Gallipoli: A British Historian's View. Parkville, VIC: Department of History, University of Melbourne.ISBN 978-0-7325-1219-4.
  9. Hart 2013a, p.12.
  10. Fromkin 1989, p.151.
  11. Broadbent 2005, pp.33-34.
  12. Broadbent 2005, p.35.
  13. Stevens, David (2001).The Royal Australian Navy. The Australian Centenary History of Defence. Vol.III. South Melbourne, Victoria: Oxford University Press.ISBN 978-0-19-555542-4,pp.44-45.
  14. Grey, Jeffrey (2008).A Military History of Australia(3rded.). Port Melbourne: Cambridge University Press.ISBN 978-0-521-69791-0,p.92.
  15. McGibbon, Ian, ed. (2000).The Oxford Companion to New Zealand Military History. Auckland, NZ: Oxford University Press.ISBN 978-0-19-558376-2,p.191.
  16. Haythornthwaite, Philip(2004) [1991].Gallipoli 1915: Frontal Assault on Turkey. Campaign Series. London: Osprey.ISBN 978-0-275-98288-1,p.21.
  17. Aspinall-Oglander, Cecil Faber(1929).Military Operations Gallipoli: Inception of the Campaign to May 1915.History of the Great WarBased on Official Documents by Direction of the Historical Section of the Committee of Imperial Defence. Vol.I (1sted.). London: Heinemann.OCLC464479053,p.139.
  18. Aspinall-Oglander 1929, pp.315-16.
  19. Aspinall-Oglander 1929, pp.232-36.
  20. Erickson, Edward J.(2001a) [2000].Ordered to Die: A History of the Ottoman Army in the First World War. Westport, Connecticut: Greenwood.ISBN 978-0-313-31516-9.
  21. Carlyon, Les(2001).Gallipoli. Sydney: Pan Macmillan.ISBN 978-0-7329-1089-1,p.232.
  22. Broadbent 2005, p.121.
  23. Broadbent 2005, pp.122-23.
  24. Broadbent 2005, pp.124-25.
  25. Broadbent 2005, pp.126, 129, 134.
  26. Broadbent 2005, pp.129-30.
  27. Aspinall-Oglander 1929, pp.288-290.
  28. Aspinall-Oglander 1929, pp.290-295.
  29. Burt, R. A. (1988).British Battleships 1889-1904. Annapolis, Maryland: Naval Institute Press.ISBN 978-0-87021-061-7,pp.158-59.
  30. Burt 1988, pp.131, 276.
  31. Broadbent 2005, p.165.
  32. Brenchley, Fred; Brenchley, Elizabeth (2001).Stoker's Submarine: Australia's Daring Raid on the Dardanellles on the Day of the Gallipoli Landing. Sydney: Harper Collins.ISBN 978-0-7322-6703-2,p.113.
  33. Aspinall-Oglander 1932, p. 85.
  34. Aspinall-Oglander 1932, p. 92.
  35. Turgut Ōzakman, Diriliş, 2008, p.462
  36. Aspinall-Oglander, Military Operations. Gallipoli. Volume 2. p.176
  37. Aspinall-Oglander 1932, p.355.
  38. Hart, Peter (2013b) [2011].Gallipoli. London: Profile Books.ISBN 978-1-84668-161-5,p.387.
  39. Gilbert 2013, p.47.
  40. Carlyon 2001, p.526.
  41. Broadbent 2005, p.266.

References


  • Aspinall-Oglander, Cecil Faber (1929). Military Operations Gallipoli: Inception of the Campaign to May 1915. History of the Great War Based on Official Documents by Direction of the Historical Section of the Committee of Imperial Defence. Vol. I (1st ed.). London: Heinemann. OCLC 464479053.
  • Aspinall-Oglander, Cecil Faber (1992) [1932]. Military Operations Gallipoli: May 1915 to the Evacuation. History of the Great War Based on Official Documents by Direction of the Historical Section of the Committee of Imperial Defence. Vol. II (Imperial War Museum and Battery Press ed.). London: Heinemann. ISBN 978-0-89839-175-6.
  • Austin, Ronald; Duffy, Jack (2006). Where Anzacs Sleep: the Gallipoli Photos of Captain Jack Duffy, 8th Battalion. Slouch Hat Publications.
  • Baldwin, Hanson (1962). World War I: An Outline History. London: Hutchinson. OCLC 793915761.
  • Bean, Charles (1941a) [1921]. The Story of ANZAC from the Outbreak of War to the End of the First Phase of the Gallipoli Campaign, May 4, 1915. Official History of Australia in the War of 1914–1918. Vol. I (11th ed.). Sydney: Angus and Robertson. OCLC 220878987. Archived from the original on 6 September 2019. Retrieved 11 July 2015.
  • Bean, Charles (1941b) [1921]. The Story of Anzac from 4 May 1915, to the Evacuation of the Gallipoli Peninsula. Official History of Australia in the War of 1914–1918. Vol. II (11th ed.). Canberra: Australian War Memorial. OCLC 39157087. Archived from the original on 6 September 2019. Retrieved 11 July 2015.
  • Becke, Major Archibald Frank (1937). Order of Battle of Divisions: The 2nd-Line Territorial Force Divisions (57th–69th) with The Home-Service Divisions (71st–73rd) and 74th and 75th Divisions. History of the Great War Based on Official Documents by Direction of the Historical Section of the Committee of Imperial Defence. Vol. IIb. London: HMSO. ISBN 978-1-871167-00-9.
  • Ben-Gavriel, Moshe Ya'aqov (1999). Wallas, Armin A. (ed.). Tagebücher: 1915 bis 1927 [Diaries, 1915–1927] (in German). Wien: Böhlau. ISBN 978-3-205-99137-3.
  • Brenchley, Fred; Brenchley, Elizabeth (2001). Stoker's Submarine: Australia's Daring Raid on the Dardanellles on the Day of the Gallipoli Landing. Sydney: Harper Collins. ISBN 978-0-7322-6703-2.
  • Broadbent, Harvey (2005). Gallipoli: The Fatal Shore. Camberwell, VIC: Viking/Penguin. ISBN 978-0-670-04085-8.
  • Butler, Daniel (2011). Shadow of the Sultan's Realm: The Destruction of the Ottoman Empire and the Creation of the Modern Middle East. Washington, D.C.: Potomac Books. ISBN 978-1-59797-496-7.
  • Burt, R. A. (1988). British Battleships 1889–1904. Annapolis, Maryland: Naval Institute Press. ISBN 978-0-87021-061-7.
  • Cameron, David (2011). Gallipoli: The Final Battles and Evacuation of Anzac. Newport, NSW: Big Sky. ISBN 978-0-9808140-9-5.
  • Carlyon, Les (2001). Gallipoli. Sydney: Pan Macmillan. ISBN 978-0-7329-1089-1.
  • Cassar, George H. (2004). Kitchener's War: British Strategy from 1914 to 1916. Lincoln, Nebraska: Potomac Books. ISBN 978-1-57488-709-9.
  • Clodfelter, M. (2017). Warfare and Armed Conflicts: A Statistical Encyclopedia of Casualty and Other Figures, 1492–2015 (4th ed.). Jefferson, North Carolina: McFarland. ISBN 978-0786474707.
  • Coates, John (1999). Bravery above Blunder: The 9th Australian Division at Finschhafen, Sattelberg and Sio. South Melbourne: Oxford University Press. ISBN 978-0-19-550837-6.
  • Corbett, J. S. (2009a) [1920]. Naval Operations. History of the Great War Based on Official Documents by Direction of the Historical Section of the Committee of Imperial Defence. Vol. I (repr. Imperial War Museum and Naval & Military Press ed.). London: Longmans. ISBN 978-1-84342-489-5. Retrieved 27 May 2014.
  • Corbett, J. S. (2009b) [1923]. Naval Operations. History of the Great War Based on Official Documents by Direction of the Historical Section of the Committee of Imperial Defence. Vol. III (Imperial War Museum and Naval & Military Press ed.). London: Longmans. ISBN 978-1-84342-491-8. Retrieved 27 May 2014.
  • Coulthard-Clark, Chris (2001). The Encyclopaedia of Australia's Battles (Second ed.). Crow's Nest, NSW: Allen & Unwin. ISBN 978-1-86508-634-7.
  • Cowan, James (1926). The Maoris in the Great War (including Gallipoli). Auckland, NZ: Whitcombe & Tombs for the Maori Regimental Committee. OCLC 4203324. Archived from the original on 2 February 2023. Retrieved 3 February 2023.
  • Crawford, John; Buck, Matthew (2020). Phenomenal and Wicked: Attrition and Reinforcements in the New Zealand Expeditionary Force at Gallipoli. Wellington: New Zealand Defence Force. ISBN 978-0-478-34812-5. "ebook". New Zealand Defence Force. 2020. Archived from the original on 8 August 2020. Retrieved 19 August 2020.
  • Dando-Collins, Stephen (2012). Crack Hardy: From Gallipoli to Flanders to the Somme, the True Story of Three Australian Brothers at War. North Sydney: Vintage Books. ISBN 978-1-74275-573-1.
  • Dennis, Peter; Grey, Jeffrey; Morris, Ewan; Prior, Robin; Bou, Jean (2008). The Oxford Companion to Australian Military History (2nd ed.). Melbourne: Oxford University Press. ISBN 978-0-19-551784-2.
  • Dexter, David (1961). The New Guinea Offensives. Australia in the War of 1939–1945, Series 1 – Army. Vol. VII (1st ed.). Canberra, ACT: Australian War Memorial. OCLC 2028994. Archived from the original on 17 March 2021. Retrieved 14 July 2015.
  • Dutton, David (1998). The Politics of Diplomacy: Britain, France and the Balkans in the First World War. London: I. B. Tauris. ISBN 978-1-86064-112-1.
  • Eren, Ramazan (2003). Çanakkale Savaş Alanları Gezi Günlüğü [Çanakkale War Zone Travel Diary] (in Turkish). Çanakkale: Eren Books. ISBN 978-975-288-149-5.
  • Erickson, Edward J. (2001a) [2000]. Ordered to Die: A History of the Ottoman Army in the First World War. Westport, Connecticut: Greenwood. ISBN 978-0-313-31516-9.
  • Erickson, Edward J. (2015) [2010]. Gallipoli: the Ottoman Campaign. Barnsley: Pen & Sword. ISBN 978-1783461660.
  • Erickson, Edward J. (2013). Ottomans and Armenians: A Study in Counterinsurgency. New York: Palgrave Macmillan. ISBN 978-1-137-36220-9.
  • Falls, Cyril; MacMunn, George (maps) (1996) [1928]. Military Operations Egypt & Palestine from the Outbreak of War with Germany to June 1917. Official History of the Great War Based on Official Documents by Direction of the Historical Section of the Committee of Imperial Defence. Vol. I (repr. Imperial War Museum and Battery Press ed.). London: HMSO. ISBN 978-0-89839-241-8.
  • Falls, Cyril; Becke, A. F. (maps) (1930). Military Operations Egypt & Palestine: From June 1917 to the End of the War. Official History of the Great War Based on Official Documents by Direction of the Historical Section of the Committee of Imperial Defence. Vol. II. Part 1. London: HMSO. OCLC 644354483.
  • Fewster, Kevin; Basarin, Vecihi; Basarin, Hatice Hurmuz (2003) [1985]. Gallipoli: The Turkish Story. Crow's Nest, NSW: Allen & Unwin. ISBN 978-1-74114-045-3.
  • Frame, Tom (2004). No Pleasure Cruise: The Story of the Royal Australian Navy. Crow's Nest, NSW: Allen & Unwin. ISBN 978-1-74114-233-4.
  • Fromkin, David (1989). A Peace to End All Peace: The Fall of the Ottoman Empire and the Creation of the Modern Middle East. New York: Henry Holt. ISBN 978-0-8050-0857-9.
  • Gatchel, Theodore L. (1996). At the Water's Edge: Defending against the Modern Amphibious Assault. Annapolis, Maryland: Naval Institute Press. ISBN 978-1-55750-308-4.
  • Grey, Jeffrey (2008). A Military History of Australia (3rd ed.). Port Melbourne: Cambridge University Press. ISBN 978-0-521-69791-0.
  • Griffith, Paddy (1998). British Fighting Methods in the Great War. London: Routledge. ISBN 978-0-7146-3495-1.
  • Gullett, Henry Somer (1941) [1923]. The Australian Imperial Force in Sinai and Palestine, 1914–1918. Official History of Australia in the War of 1914–1918. Vol. VII (10th ed.). Sydney: Angus and Robertson. OCLC 220901683. Archived from the original on 10 August 2019. Retrieved 14 July 2015.
  • Hall, Richard (2010). Balkan Breakthrough: The Battle of Dobro Pole 1918. Bloomington: Indiana University Press. ISBN 978-0-253-35452-5.
  • Halpern, Paul G. (1995). A Naval History of World War I. Annapolis, Maryland: Naval Institute Press. ISBN 978-1-55750-352-7.
  • Harrison, Mark (2010). The Medical War: British Military Medicine in the First World War. Oxford: Oxford University Press. ISBN 978-0-19957-582-4.
  • Hart, Peter (2013b) [2011]. Gallipoli. London: Profile Books. ISBN 978-1-84668-161-5.
  • Hart, Peter (2020). The Gallipoli Evacuation. Sydney: Living History. ISBN 978-0-6489-2260-5. Archived from the original on 14 May 2021. Retrieved 24 October 2020.
  • Haythornthwaite, Philip (2004) [1991]. Gallipoli 1915: Frontal Assault on Turkey. Campaign Series. London: Osprey. ISBN 978-0-275-98288-1.
  • Holmes, Richard, ed. (2001). The Oxford Companion to Military History. Oxford: Oxford University Press. ISBN 978-0-19-866209-9.
  • Hore, Peter (2006). The Ironclads. London: Southwater. ISBN 978-1-84476-299-6.
  • James, Robert Rhodes (1995) [1965]. Gallipoli: A British Historian's View. Parkville, VIC: Department of History, University of Melbourne. ISBN 978-0-7325-1219-4.
  • Jobson, Christopher (2009). Looking Forward, Looking Back: Customs and Traditions of the Australian Army. Wavell Heights, Queensland: Big Sky. ISBN 978-0-9803251-6-4.
  • Jose, Arthur (1941) [1928]. The Royal Australian Navy, 1914–1918. Official History of Australia in the War of 1914–1918. Vol. IX (9th ed.). Canberra: Australian War Memorial. OCLC 271462423. Archived from the original on 12 July 2015. Retrieved 14 July 2015.
  • Jung, Peter (2003). Austro-Hungarian Forces in World War I. Part 1. Oxford: Osprey. ISBN 978-1-84176-594-5.
  • Keogh, Eustace; Graham, Joan (1955). Suez to Aleppo. Melbourne: Directorate of Military Training (Wilkie). OCLC 220029983.
  • Kinloch, Terry (2007). Devils on Horses: In the Words of the Anzacs in the Middle East 1916–19. Auckland, NZ: Exisle. OCLC 191258258.
  • Kinross, Patrick (1995) [1964]. Ataturk: The Rebirth of a Nation. London: Phoenix. ISBN 978-0-297-81376-7.
  • Lambert, Nicholas A. (2021). The War Lords and the Gallipoli Disaster. Oxford: Oxford University Press. ISBN 978-0-19-754520-1.
  • Lepetit, Vincent; Tournyol du Clos, Alain; Rinieri, Ilario (1923). Les armées françaises dans la Grande guerre. Tome VIII. La campagne d'Orient (Dardanelles et Salonique) (février 1915-août 1916) [Ministry of War, Staff of the Army, Historical Service, French Armies in the Great War]. Ministère De la Guerre, Etat-Major de l'Armée – Service Historique (in French). Vol. I. Paris: Imprimerie Nationale. OCLC 491775878. Archived from the original on 8 April 2022. Retrieved 20 September 2020.
  • Lewis, Wendy; Balderstone, Simon; Bowan, John (2006). Events That Shaped Australia. Frenchs Forest, NSW: New Holland. ISBN 978-1-74110-492-9.
  • Lockhart, Sir Robert Hamilton Bruce (1950). The Marines Were There: The Story of the Royal Marines in the Second World War. London: Putnam. OCLC 1999087.
  • McCartney, Innes (2008). British Submarines of World War I. Oxford: Osprey. ISBN 978-1-84603-334-6.
  • McGibbon, Ian, ed. (2000). The Oxford Companion to New Zealand Military History. Auckland, NZ: Oxford University Press. ISBN 978-0-19-558376-2.
  • Mitchell, Thomas John; Smith, G. M. (1931). Casualties and Medical Statistics of the Great War. History of the Great War. Based on Official Documents by Direction of the Committee of Imperial Defence. London: HMSO. OCLC 14739880.
  • Moorehead, Alan (1997) [1956]. Gallipoli. Ware: Wordsworth. ISBN 978-1-85326-675-1.
  • Neillands, Robin (2004) [1998]. The Great War Generals on the Western Front 1914–1918. London Books: Magpie. ISBN 978-1-84119-863-7.
  • Newton, L. M. (1925). The Story of the Twelfth: A Record of the 12th Battalion, A. I. F. during the Great War of 1914–1918. Slouch Hat Publications.
  • Nicholson, Gerald W. L. (2007). The Fighting Newfoundlander. Carleton Library Series. Vol. CCIX. McGill-Queen's University Press. ISBN 978-0-7735-3206-9.
  • O'Connell, John (2010). Submarine Operational Effectiveness in the 20th Century (1900–1939). Part One. New York: Universe. ISBN 978-1-4502-3689-8.
  • Özakman, Turgut (2008). Dirilis: Canakkale 1915. Ankara: Bilgi Yayinev. ISBN 978-975-22-0247-4.
  • Parker, John (2005). The Gurkhas: The inside Story of the World's Most Feared Soldiers. London: Headline Books. ISBN 978-0-7553-1415-7.
  • Perrett, Bryan (2004). For Valour: Victoria Cross and Medal of Honor Battles. London: Cassel Military Paperbacks. ISBN 978-0-304-36698-9.
  • Perry, Frederick (1988). The Commonwealth Armies: Manpower and Organisation in Two World Wars. Manchester: Manchester University Press. ISBN 978-0-7190-2595-2.
  • Pick, Walter Pinhas (1990). "Meissner Pasha and the Construction of Railways in Palestine and Neighbouring Countries". In Gilbar, Gad (ed.). Ottoman Palestine, 1800–1914: Studies in Economic and Social History. Leiden: Brill Archive. ISBN 978-90-04-07785-0.
  • Pitt, Barrie; Young, Peter (1970). History of the First World War. Vol. III. London: B.P.C. OCLC 669723700.
  • Powles, C. Guy; Wilkie, A. (1922). The New Zealanders in Sinai and Palestine. Official History New Zealand's Effort in the Great War. Vol. III. Auckland, NZ: Whitcombe & Tombs. OCLC 2959465. Archived from the original on 2 February 2016. Retrieved 15 July 2016.
  • Thys-Şenocak, Lucienne; Aslan, Carolyn (2008). "Narratives of Destruction and Construction: The Complex Cultural Heritage of the Gallipoli Peninsula". In Rakoczy, Lila (ed.). The Archaeology of Destruction. Newcastle: Cambridge Scholars. pp. 90–106. ISBN 978-1-84718-624-9.
  • Rance, Philip (ed./trans.) (2017). The Struggle for the Dardanelles. Major Erich Prigge. The Memoirs of a German Staff Officer in Ottoman Service. Barnsley: Pen & Sword. ISBN 978-1-78303-045-3.
  • Reagan, Geoffrey (1992). The Guinness Book of Military Anecdotes. Enfield: Guinness. ISBN 978-0-85112-519-0.
  • Simkins, Peter; Jukes, Geoffrey; Hickey, Michael (2003). The First World War: The War to End All Wars. Oxford: Osprey. ISBN 978-1-84176-738-3.
  • Snelling, Stephen (1995). VCs of the First World War: Gallipoli. Thrupp, Stroud: Gloucestershire Sutton. ISBN 978-0-905778-33-4.
  • Strachan, Hew (2003) [2001]. The First World War: To Arms. Vol. I. Oxford: Oxford University Press. ISBN 978-0-19-926191-8.
  • Stevens, David (2001). The Royal Australian Navy. The Australian Centenary History of Defence. Vol. III. South Melbourne, Victoria: Oxford University Press. ISBN 978-0-19-555542-4.
  • Stevenson, David (2005). 1914–1918: The History of the First World War. London: Penguin. ISBN 978-0-14-026817-1.
  • Taylor, Alan John Percivale (1965). English History 1914–1945 (Pelican 1982 ed.). Oxford: Oxford University Press. ISBN 978-0-19-821715-2.
  • Tauber, Eliezer (1993). The Arab Movements in World War I. London: Routledge. ISBN 978-0-7146-4083-9.
  • Travers, Tim (2001). Gallipoli 1915. Stroud: Tempus. ISBN 978-0-7524-2551-1.
  • Usborne, Cecil (1933). Smoke on the Horizon: Mediterranean Fighting, 1914–1918. London: Hodder and Stoughton. OCLC 221672642.
  • Wahlert, Glenn (2008). Exploring Gallipoli: An Australian Army Battlefield Guide. Australian Army Campaign Series. Vol. IV. Canberra: Army History Unit. ISBN 978-0-9804753-5-7.
  • Wavell, Field Marshal Earl (1968) [1933]. "The Palestine Campaigns". In Sheppard, Eric William (ed.). A Short History of the British Army (4th ed.). London: Constable. OCLC 35621223.
  • Weigley, Russell F. (2005). "Normandy to Falaise: A Critique of Allied Operational Planning in 1944". In Krause, Michael D.; Phillips, R. Cody (eds.). Historical Perspectives of the Operational Art. Washington, D.C.: Center of Military History, United States Army. pp. 393–414. OCLC 71603395. Archived from the original on 20 February 2014. Retrieved 12 November 2016.
  • West, Brad (2016). War Memory and Commemoration. Memory Studies: Global Constellations. London and New York: Routledge. ISBN 978-1-47245-511-6.
  • Williams, John (1999). The ANZACS, the Media and the Great War. Sydney: UNSW Press. ISBN 978-0-86840-569-8.
  • Willmott, Hedley Paul (2009). The Last Century of Sea Power: From Port Arthur to Chanak, 1894–1922. Bloomington: Indiana University Press. ISBN 978-0-253-00356-0.